

Ultimate Guide to the LinkedIn Experience Section
A year ago I conducted an experiment. I asked 30 people (five job seekers and 25 business owners) how they view LinkedIn profiles. I didn’t use eye-tracking software, so not the most robust test, I’ll admit. But the results were so decisive that I thought I’d share them with you.
Twenty-six of the 30 people I asked look at a LinkedIn profile in this order:
- The person’s face
- Headline
- Background
- Experience
- About
Like it or not, people are judgemental. After scanning over the visual elements of your profile and the first few words of your headline, they jump ahead to the Experience section. They are searching for a box, a squeaky-clean category to put you in. It’s another example of the human mind using shortcuts to make sense of the world.
The problem is, many LinkedIn users underutilise their Experience section. Sometimes, it’s empty. Other times, it’s packed full of irrelevant or inappropriate information about the company. Very, very often, there’s little to no explanation of what they actually did in their position and no assigned Skills. As Bob McIntosh says, “they’re robbing readers, namely recruiters, of valuable information.”
Whether you’re looking for a new job, clients, investors, or top talent, your Experience section is your opportunity to define the box you’re put into. Your About (everything you need to know about writing a LinkedIn About section here and here) communicates who you are and why you do what you do. But it’s your Experience section that highlights what you bring to the table, your skills, your value proposition, and how you can help your target audience get where they want to go.
Here’s what you need to know about curating a high-impact Experience section.
Link to the right companies
Every company listed in your LinkedIn Experience section should be accompanied by a logo. No logo means no credibility. And that’s not good for job seekers, business owners, or anyone else using LinkedIn.
Only companies with a LinkedIn company page will give you a logo in your Experience section, and company pages only came into the fold in 2018. So, go back through your work history and link each role with the company’s LinkedIn page.
Tip: Type the company’s name really, really slowly. It can take a little while for the company page with the logo to pop up.
Linking your Experience to the right company page also helps boost your personal profile’s ranking – i.e., whether your face appears on page 1 or page 100 of the search results. No one knows the magic formula that determines each of our rankings, but we know that you’ll show up higher for colleagues in search results if you’re both linked to the same company.
Troubleshooting
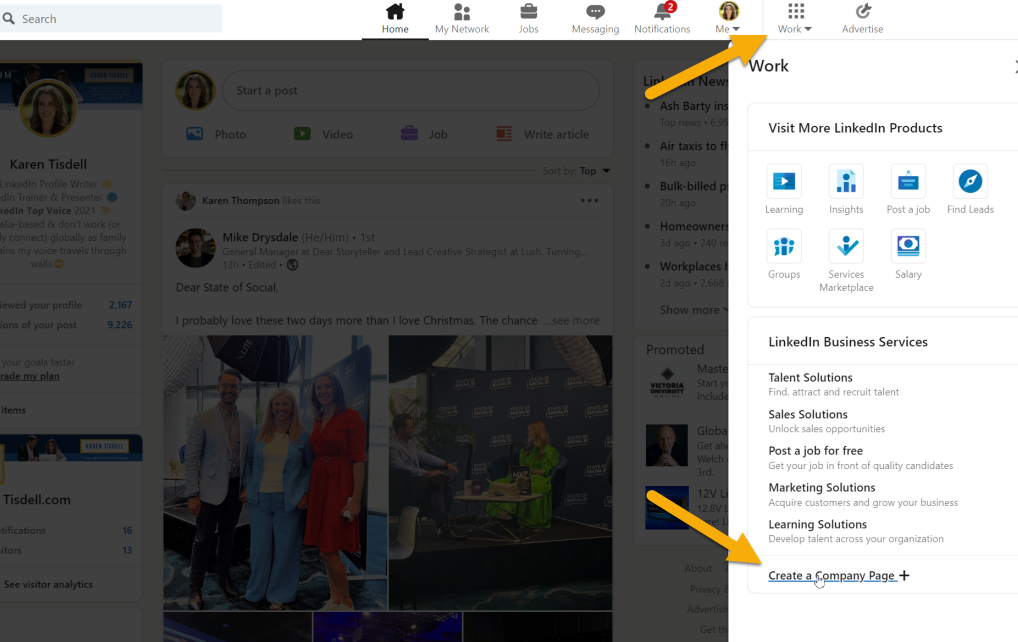
Help! I work for myself. I don’t have a company page with a logo. It’s time to make one. They are super easy to set up and don’t cost a dollar. Navigate to the Work tab, scroll to the bottom of the menu, and click Create a Company Page +. (If you’re still not convinced on the value of a company page, read this or listen to company pages expert Michelle J Raymond being interviewed by the world’s undisputed best LinkedIn trainer Mark Williams).
Help! I worked for a company that changed its name. If your old stomping ground changed its name or was bought by another company, link your Experience section to whichever name has a company page. In the body of your Experience, make a note that the company was called something different when you worked there.
Help! I know my company has a LinkedIn page, but I can’t find it. This is a really common problem. It’s actually why I was engaged by O&M Halyard Asia Pac, previously Halyard Health. All the employees were linked to the old Halyard Health page, something I changed for the sales team in a done-for-you group offering. My advice to you though is to type super slowly and try variations of your company name in the search bar (click Companies) to see how the company name, or acronym, the business is listed. You could also look at your colleagues’ LinkedIn profiles to see if they’ve managed to link their Experience section to the right company page.
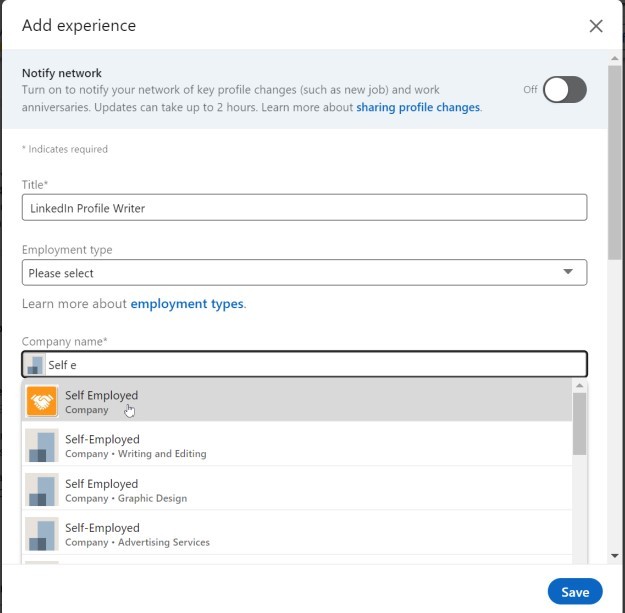
Help! I run a side hustle that doesn’t (yet) warrant a company page. Absolutely include it in your Experience section (more on this below) and use LinkedIn’s Self-Employed feature. Just type ‘Self-Employed’ into the company name field. LinkedIn will give you an orange shaking hands image. A disadvantage of this approach is that you won’t have anything at the very top of your profile where a company logo typically shows up.
Make every word count
The hard part: writing. Let’s break it down.
Title
In a few words, a title gives your profile visitors an idea of what you do, your expertise, and your career level. Business owners can get creative if they want, but job seekers should stick to the script. Use common or standard titles by, again, typing slowly and picking the default option. Your titles inform LinkedIn Recruiters’ search function.
Body
Don’t copy and paste from your resume. Job seekers, I’m talking to you. You don’t want to give everything away. Give your profile visitors a taste of your value, and tease out your expertise. Use your Experience to highlight key points only, and not the key points that matter to you, but the key points that matter to your target audience.
You have 2,000 characters in total and it is best to use strong, active verbs. Keep sentences short and punchy. Conquer your reader’s attention. If you’ve written ‘key responsibilities,’ you’re not on the right track. Some active words to get you thinking include drove, collaborated, initiated, aligned, negotiated, established, and secured.
Don’t make sweeping heroic statements, but don’t undersell your awesomeness, especially if you’re a job seeker. You really don’t want to come across as apologetic, indecisive, or unsure of your skills.
Use visual elements like emojis and Yaytext.com to break up big chunks of text – but use them sparingly. Less is more. Also, keep in mind that emojis and Yaytext (or Lingojam) can’t be read by people using reading options or by LinkedIn’s search function. So don’t put keywords in bold or you will render yourself invisible. If you’re a job seeker, don’t put emojis in your titles.
Using Yaytext.com to bold text:
Using emojis:
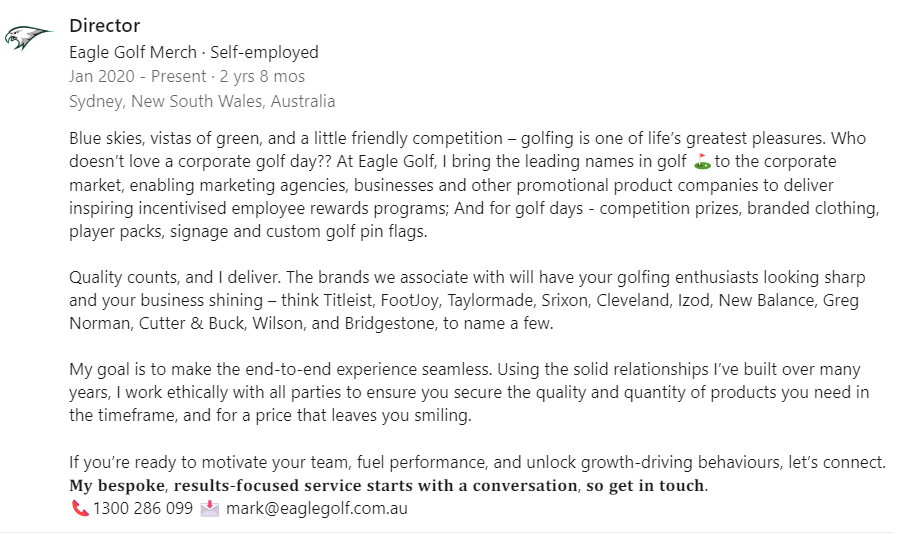
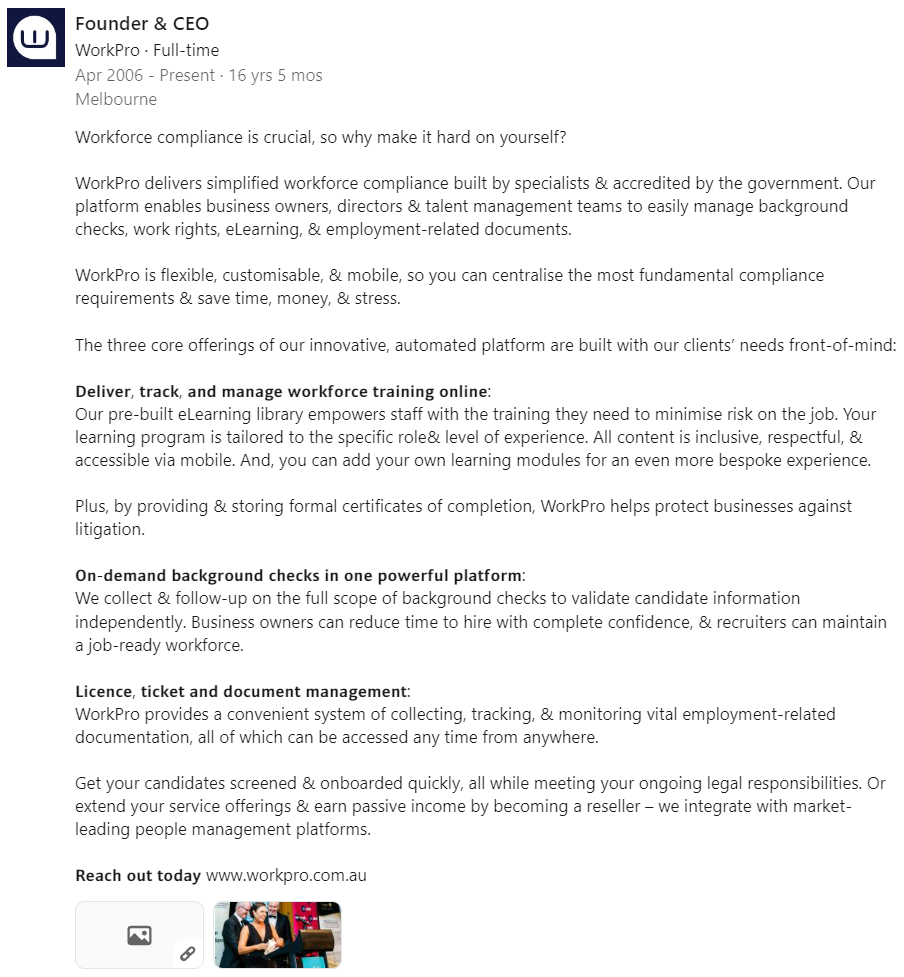
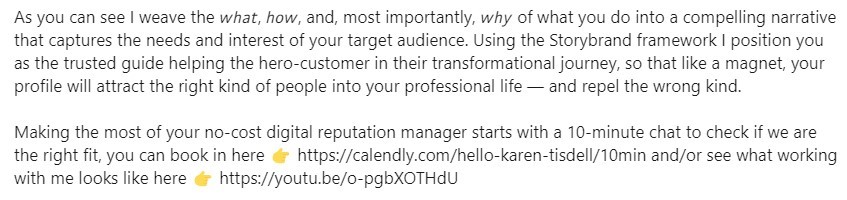
Business owners, flesh out your experience as much as your About section. Leverage the Storybrand framework to take readers on a journey. Position your client as the hero, recognise and address their pain points, talk to the transformation and, finally, end with a confident call-to-action. And, please, not ‘Feel free to…’ These words don’t inspire action. I can see the nonchalant, I-don’t-care shrug from here. And probably don’t offer a free 30-minute coaching call, either. Every coach seems to be handing out 30-minute calls, and your reader knows there’s no such thing as a free lunch.
Here’s my use of Yay-text use of italics and call-to-action:
And one last note, especially for job seekers: Don’t disclose dollar amounts or sensitive information if it’s confidential or not widely known.
Organise board positions, contract work, side hustles and other unconventional roles
Quick story time. In 2020 I was asked how much public speaking experience I had. I’ve trained countless large sales teams and spoken at many membership organisations since 2014. I lecture MBA’s at UTS Business School. I run LinkedIn workshops for Sydney Community College every three months, and have worked there since 2017. I’ve worked for conference organisers Liquid Learning since 2018, up until quite recently. So a fair bit. This question prompted me to add a new role to my experience section. I switched on notifications so everyone would see. People reached out via DM to congratulate me, and I even picked up three new gigs!
The takeaway: Make sure your Experience section covers the full breadth of your offering. Don’t assume people understand what you do.
Assign skills
You can now assign Skills to each role in your Experience section, which is a welcome new feature for several reasons. First, Skills are located way, way down your profile, far from your Experience section. By attaching them to each role, you can bet more people will see your unique value proposition. Second, people are skim readers, and very few will read every position listed in your Experience word for word. Assigned Skills ensure people snooping on your profile get what you bring to the table at a glance. And finally, while it might not have an impact in the short term (because this is a new addition that LinkedIn is waiting for more people to adopt), I can safely assume that assigning Skills to various roles will boost your visibility long-term in LinkedIn search, which is essential for job seekers.
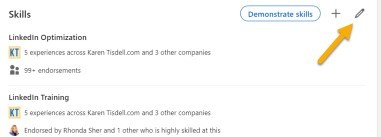
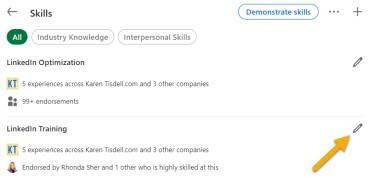
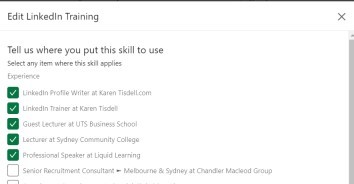
To add Skills to each role go to your Skills section, click the pencil icon, then the second pencil beside the skill you would like to assign to one or more roles. Check the roles where the Skill applies and hit ‘Save.’ Done.
Deciding which Skills to add is a little more strategic. LinkedIn caps the number of Skills you can have to 50, which is more than enough. Too many, and you dilute your endorsements as well as overwhelm people. I have just 25. LinkedIn recommends adding five Skills to each role, but you can add more. Skills with the highest number of endorsements show up first in the Experience section (the number of endorsements isn’t displayed in this section).
BOARD POSITIONS AND EXTRA-CURRICULAR WORK
Don’t include these roles in your Volunteer section – even if you were volunteering. In my experience as both a former recruiter and profile writer, people don’t tend to scroll down that far. Plus, you’ll rank higher in keyword searches if you list board roles in your Experience section.
SIDE HUSTLES
More and more people are taking up side hustles – it’s become normal, even wise, to have a second business on the side. Create a company page for your business, and worry less about jeopardising your job (or job search). Any decent employer will want people who show an entrepreneurial spirit.
GIG WORKERS AND CONSULTANTS
If you’ve worked across many projects over many years, consider grouping them all into one or two positions. Although separate sections for each role will boost your relevancy in search results (because of the Titles), it’s important to keep your reader front and centre. It’s a whole lot easier to glance over a couple of Experience sections than 20.
It is also important to ensure that first page has impact.
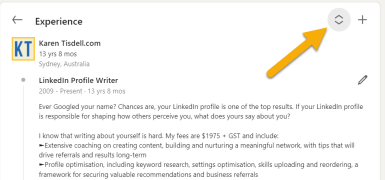
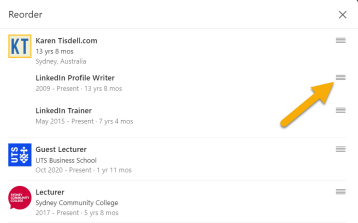
ORDERING YOUR UNCONVENTIONAL ROLES
You can’t change the order of all your roles – they are organised by date. But if you have side hustles or concurrent roles, you can reorganise them depending on your priorities. Click on the hamburger menu and toggle the role up or down.
Add Media
An optimised LinkedIn profile isn’t a resume on steroids – it’s a sophisticated digital reputation manager. Adding media to your Experience section is a high-impact way to showcase your expertise and influence how others think about you without bragging. Australians don’t like braggarts – we want people who are with us.
You can add media – external new articles, videos, photos, website links, and SlideShare presentations – to each role in your Experience section. Think of it as evidence of previous successes. It’s showing, not telling.
Know why you are on LinkedIn, and let that goal drive your Experience section
One of the most common questions I get is this: How far back should I go in my LinkedIn Experience section?
I say go all the way.
Why? Because it builds context and provides as many opportunities as possible to include those all-important keywords (of course, don’t compromise readability for keywords – keywords might attract someone to your profile, but it’s your writing that will inspire action and convert them). More recent roles must have lots of detail. Older roles can just be a title and one line.
If you’re a job seeker, here’s the kicker – tailor all your past roles to reflect the role you want in the future. In other words, start with a goal, and make sure every role listed in your Experience section moves you closer to that goal.
Over to you
I know that was a ton of information to process, but I know that the Experience section is too often underutilised and always one of the most important parts. It’s why my profile writing service covers far more than just an About section, as well as working with a graphic designer to optimise photos and create unique background banner I re-write every single Experience section so that it feels to the reader like everything you have ever been doing was leading to this moment. Your profile needs to feel like this too…
Will you be changing anything about your Experience section after reading? Perhaps assigning Skills to each role? I want to know.